Tuesday, November 29, 2011

Fun with Dick and Jane

Last April, my BFAB Carla, organized a swap of 5" I-Spy squares. With three little grandsons, I knew I'd need a lot of blocks, so I swapped three sets. Even though I was very pleased with the squares I received, I continued to pick up fat quarters here and there. Then, a very good friend, Norma, simply gave me a whole lot more squares that she had from the same swap! Thank you very much, Norma!

One of my little grandies, 26 month-old Tay, is talking up a storm. He's speaking in complete sentences. For example, he recently said to his mom, "Talk to Nana on the 'puter." (Skype). He's learning so quickly that I decided that by Christmas he will be good and ready for the fun and challenge of an I-Spy quilt. And his little 13 month-old brother will benefit too.

With inspiration from Robin who made this quilt seen on Carla's blog, I made this quilt top one evening.
incomplete quilt top, 45" X 54"
I inquired how Robin quilted hers, and then agreed with her assessment that an all over design is the only way to quilt such a busy top. This is my first quilting attempt at big, loopy bubbles. I like them!


Finished I-Spy, 48" X 57"
I couldn't leave out a square of UNI Panther (University of Northern Iowa) fabric. A couple years ago, I bought four yards of it when I came across it at a local quilt show. Last year, I went to the UNI campus to look for it in the University Bookstore, I learned that the fabric had been printed without legal permission! I've since been very particular about where and how I use the precious amount of fabric I have left.

For the back, I came across the perfect fabric in the bottom of one of my bins. It's Michael Miller's "Dick and Jane" fabric that I bought when it came out about five years ago.

It will be ideal in helping teach alphabet letters and perhaps a few words. After all, Dick, Jane and Sally - Spot and Puff too - taught me to read!

The quilt front has 99 squares, so with Christmas tree beside the label, that makes 100 blocks for the boys to I-Spy.

I can't wait to play it with them. Linda

Wednesday, November 23, 2011

Space Crystals

While telling students in a recent Stitchin' Mission class about binding, and how it can be sewn to a quilt in many different ways, I recalled this quilt that hasn't seen the light of day for several years. It's another older quilt that's tucked into a pillowcase in my quilt cupboard. 
"Space Crystals," 40" X 40"

When I teach about binding a quilt, I explain how it can be sewn to a quilt using a variety of methods. (If you haven't already, be sure to check out my tutorial for non continuous sewn binding.) And a few different e
nhancements can make binding more of an accessory to a quilt than just a finished edge.
Susan Cleveland's Piping Hot Binding tool makes piped binding an easy enhancement. While it's not appropriate for every quilt, it can add a little pop. My challenge is to remember to keep yards and yards of cording on hand for whenever it strikes me that "this is a quilt for piped binding." 
On this all batik quilt, a small purple batik piping contrasts with the black-blue background.

Also, instead of the usual mitered corner binding, I sewed binding on a curve drawn along a sandwich plate. Much easier than mitering!

I did this quilting without a stitch regulator, on a Bernina QE153, which I no longer have. These days I'm quilting on a Pfaff Grand Quilter... without a frame; while sitting down.


"Space Crystals" was made during a 2006 class with Sara Nephew whose geometric designs have always appealed to me. Though I like this quilt, there's absolutely no suitable place for it in my home, nor the homes of my kids. It earned a second-place ribbon at the 2006 Des Moines Area Quilters Guild annual quilt show. 
40" X 40"
Linda

Monday, November 21, 2011

Zig-Zag

Recently, when going through my quilt cupboard where I have too many quilts folded-up and tucked into pillowcases, I came across this made-in-2006 quilt. It's one I created and wrote a pattern for when I began teaching quiltmaking. Because of its effective use of scrappy lights and darks, it's a good lesson in starting to understand value as it relates to color.
"Zig-Zag," 48" X 60"
Quilting is easy with a simple stipple design, and effective with variegated thread.


Big, double loops give interest to the border.


Since none of the five Stitchin' Mission lessons I teach are about how to sew on the bias (except for joining binding strips), this pattern allows Stitchin' Mission "graduates" to try sewing on the diagonal to make half-square triangles.
48" X 60"
If you like Zig-Zag, the free download is here, on the Stitchin' Mission website. Linda

Saturday, November 19, 2011

Was Ugly. Still Ugly?

In September, quilters who wanted to participate in our DSMMQG (Des Moines Modern Quilt Guild) "One Fourth Ugly" swap brought in a sack with a quarter yard of fabric, or equivalent pieces of a quarter yard of fabric, and took home someone else's fabric. We had two months to make something using that ugly stuff, and can keep what we made. Last night's DSMMQG meeting was our big reveal.

Here's mine.
"Ugly," 31-1/2" X 31-1/2"
The single piece of fabric in my sack was the tone-on-tone dull aqua print. It appears as wedges in each circle, and as binding.

Flipping through my trusty Encyclopedia of Pieced Quilt Patterns, I came across this "Snowball Wreath" and proceeded to figure out how to make it.


Piecing and machine applique were both used to make four 15" finished blocks. 

I quilted with bright yellow 50-weight Aurifil thread.

The quilting designs include lots of channel quilting marked with a Hera marker, and free motion bubbles.


Because the challenge was to use ugly fabric I made that perfectly clear on the quilt back! Since winning a giveaway that included the book "Word Play Quilts," (Thank you, Madame Samm!) I'm having fun finding places to put words. 
indoor photo
Three more of my own ugly prints were used up in this backing too. Yay! This print, that I finally used up, was bought sometime in the mid-80's. I've heard, but can't find any supporting evidence, that it's considered "a classic." It was one of Concord's (?) most popular prints and was available in several colorways. I also have it in lavender.

Though I didn't use to be, I'm now fairly diligent about making sure my quilts get a label.

For this quilt, I probably didn't need a label at all since this really says it. 

Check out more of our uglies on Doris's blog. And even more pictures of uglies and our holiday swap items are on our modern guild website

The antithesis of ugly is this - what our front yard looked like a couple days ago. It was quite literally "raining leaves"...  pretty golden-colored ones from a maple tree. 

However, by the end of the day the tree was bereft of leaves, and after several passes with the mulching lawn mower, was a mass of golden compost. Such a pretty end to autumn. Linda

Wednesday, November 16, 2011

Friendship Medallion - Part 6

There's not much to say about Part 6. It's large blue and white half-square triangles added to the top and bottom of this square quilt, making it a rectangle. It's 67-1/2" X 76-1/2" now, with two more parts to go.

Part 7 will no doubt take a little time. Hmm, only 288 one-and-a-half inch white squares, and  360 one-and-a-half inch medium and dark squares to make 72 three-inch square (finished) Nine Patch blocks!

To be perfectly honest, I've had a happy accident, and am further along on Part 7 than I would have expected. You see, in October I decided to make my first ever "Leaders and Enders" project. If you don't know what this is, go here to Bonnie Hunter's site to read more about it.

Basically, it's a way to make a quilt while you're working on something else. You only need to have a whole bunch of fabric pieces cut out so that you can start (leaders) and end (enders) every seam of your current project with Leaders and Enders pieces to sew together. It's a secondary quilt to the primary quilt (or project) you're working on.

This is the basket of 1-1/2 squares I've been cutting for several months as I have systematically been working through my fabric bins to downsize. These 1-1/2" squares in my rectangle basket are the smallest ready-to-sew size I've been cutting before tossing scraps into a bag.

The Leaders and Enders patches I started sewing together in October are 1-1/2" squares. I've already sewn heaps of pairs and tossed them into this round basket.

So all those 1-1/2" cut squares - in the rectangle basket - are exactly the size needed for the 72 Nine Patch blocks in the Friendship Medallion quilt! How fortuitous is that?! I'm tickled about it because in just a couple days I've gotten a good start on Nine Patch blocks that will look like this for Part 7 of Friendship Medallion. It's a Nine Patch in a Square.
5-3/4" X 5-3/4" unfinished
Have I mentioned before how much I'm lovin' this project?! I think so. Hmm, maybe once or twice.

The colors! It's amazing to me how all my old traditional prints - many purchased in the 1980s and 1990s - look almost modern when neighbored with bright colors and a white (mostly) background. They play well together, and I love these color groupings.

Something else that's fun to do and might make you happy too... A dear friend sent me the link to a color test - a hue test - which I found quite interesting. I'm happy to say I scored perfectly, a zero. To take the hue test yourself go to: FM 100 Hue Test. I recommend you're in in a well-lit area when you take it.

What this test tells me is that even though I can perfectly line up a graduated series of hues, when it comes to choosing colors of fabrics to go together, I can still fail miserably. But maybe this Friendship Medallion is an exception. That remains to be seen. Linda

Monday, November 14, 2011

Friendship Medallion - Part 5

The first five parts of Friendship Medallion are done and it's now 65-1/2" X 65-1/2". It's too big for my design wall, so that's why it looks a little ripply on the right side - part of it is masking-taped to the concrete wall. But boy, am I likin' this or what!? 
Friendship Medallion
If you're thinking this is a great project for stash-busting, you're right. I can now get the lids back onto a few of my fabric bins!

If you'd like to join in, do! It's free.
There are no time constraints for making this quilt, just a few simple rules:
  1. No buying fabric! Make it from your stash.
  2. Swap fabric with friends for greater variety. Hence the name "Friendship Medallion."
  3. To get instructions for each step, email a picture of your finished previous step to the Patchwork Pumpkin quilt shop.
To register, just go here to Patchwork Pumpkin. Then, Therese will email you instructions to begin making part one, the checkerboard center. 


Therese emailed me to say that quite a few people are making FM since reading my blog. The world seems a little smaller for knowing that I'm sharing this with some of you. I hope to see more FMs started in your blogs that I follow.

I have FM part six in hand. What color next? Probably blue. Then two more parts to go. Funny how it works. Each part seems to take just a little longer than the previous one.

Check out my friend Kerry's quilt at ALittleStitching. Hers is an assortment of scrappy colors. So pretty! Linda

Saturday, November 12, 2011

A Stitchin' Mission Quilt

The last of five Stitchin' Mission lessons was Thursday evening. Besides teaching about quilt labels, I turned in the quilt I made that will go to House of Mercy here in Des Moines.

This quilt is sewn with fabrics donated to Stitchin' Mission by members of  Faith Lutheran Church in Clive, where our lessons were held. The design is one I call "Stairs to Heaven," and it uses only "loaves" - 3-1/2" X 6-1/2" rectangles.
"Stairs to Heaven," 48" X 60"
Whenever I have a leftover fabric I want to use up, I cut 3-1/2" X 6-1/2" loaves. They have many design possibilities for sewing into mission quilts.

See more photos of Stitchin' Mission quilts here, on the SM blog. Sixty-plus quilts were made during this series of five free beginner quiltmaking lessons! Wow! You can see the quilts in person next weekend, November 19-20 when they'll be displayed in the sanctuary at Faith Lutheran Church on University Avenue next to K-Mart, in Clive.

By the way, that is snow you're seeing in the background of my photos. We woke Wednesday morning to three inches of the stuff. Winter is officially here. Linda

Tuesday, November 8, 2011

Getting Away, to Kansas City

For four days, over the weekend, we were in Kansas City.

On Saturday I went on a day-long, 9 a.m. to 7 p.m., quilt retreat with my good friend, Carla. It was our first time sewing together, and - no surprise - we had a great time. We met up, and I rode with her to Bucyrus, Kansas, where our quilt retreat was in a church building on the grounds of this beautiful old church. 
Queen of the Holy Rosary Catholic Church, Bucyrus, Kansas
The retreat space was very large with banks of windows on three sides, and good overhead lighting.
Retreat space
Carla and I had a special project planned to work on together.
Carla
Robin joined us, bringing along her hand embroidery. She also rotary cut Carla's sewn strips since Carla is a little hand-icapped from a tumble down the stairs. Though Carla assured us she could rotary cut, watching her use her elbow to stabilize the ruler didn't reassure us!
Robin
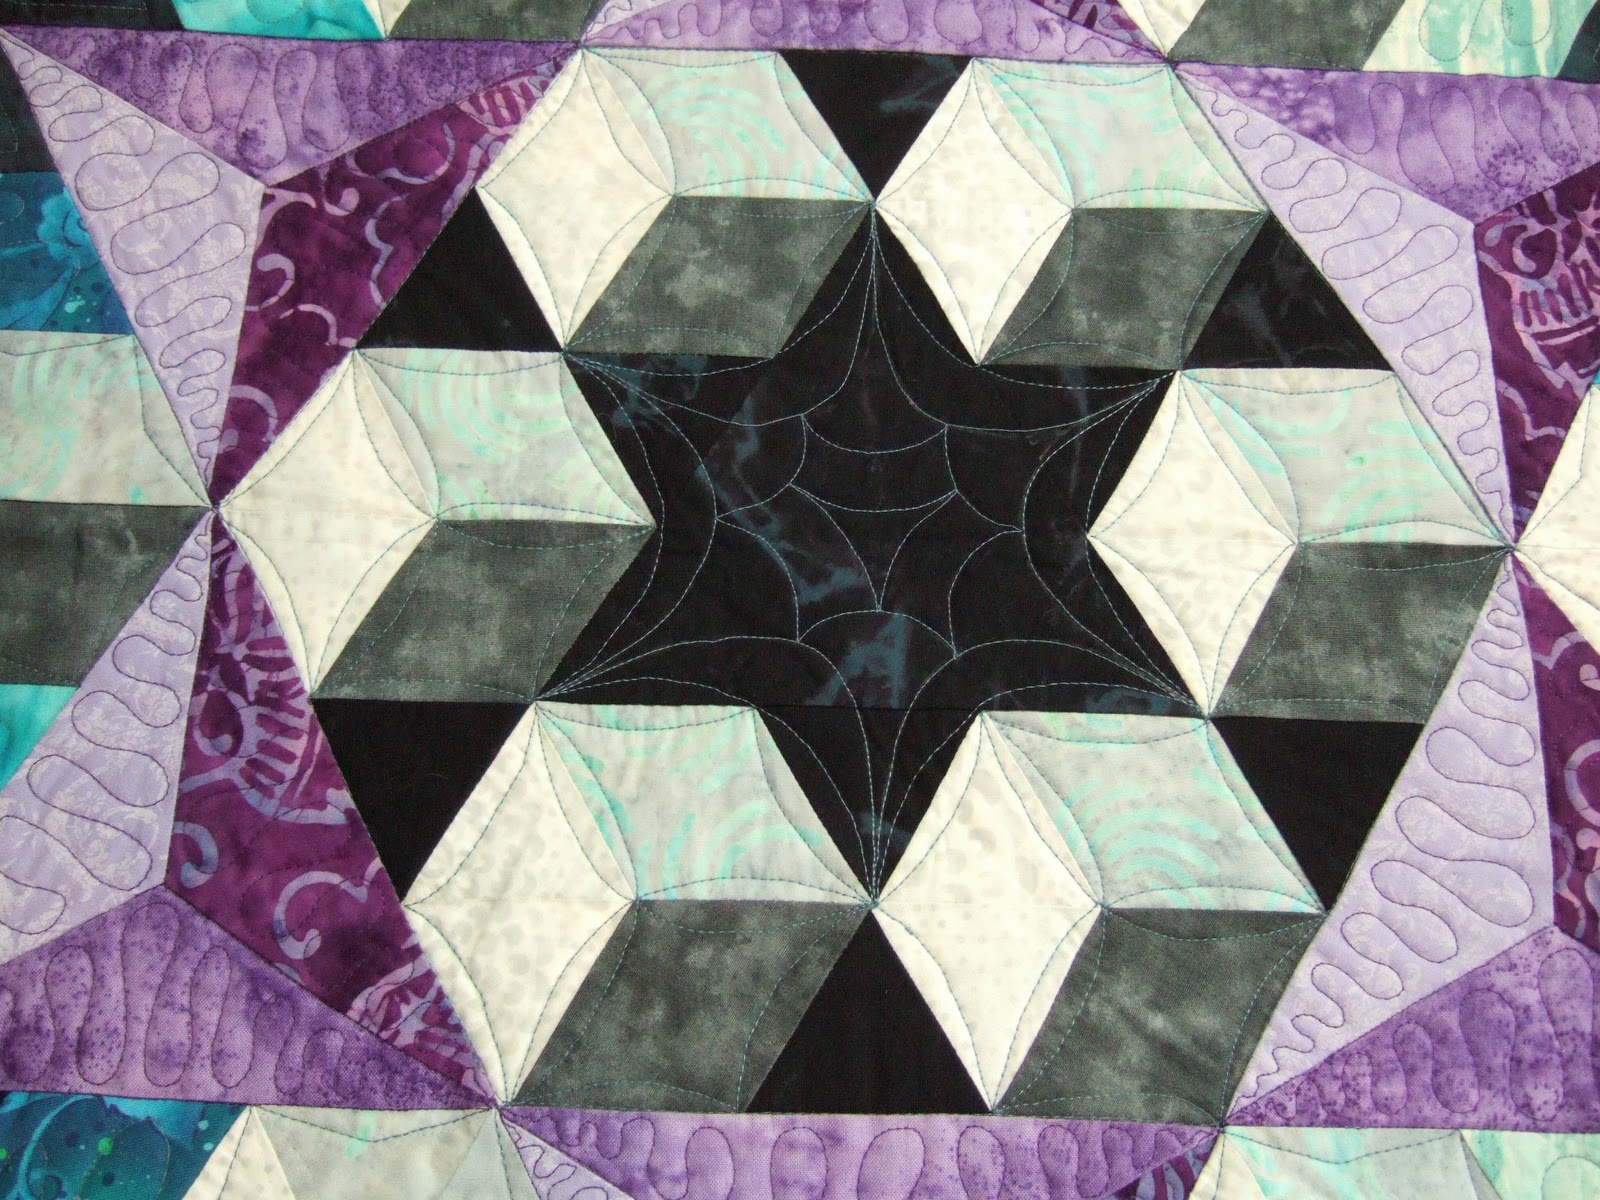
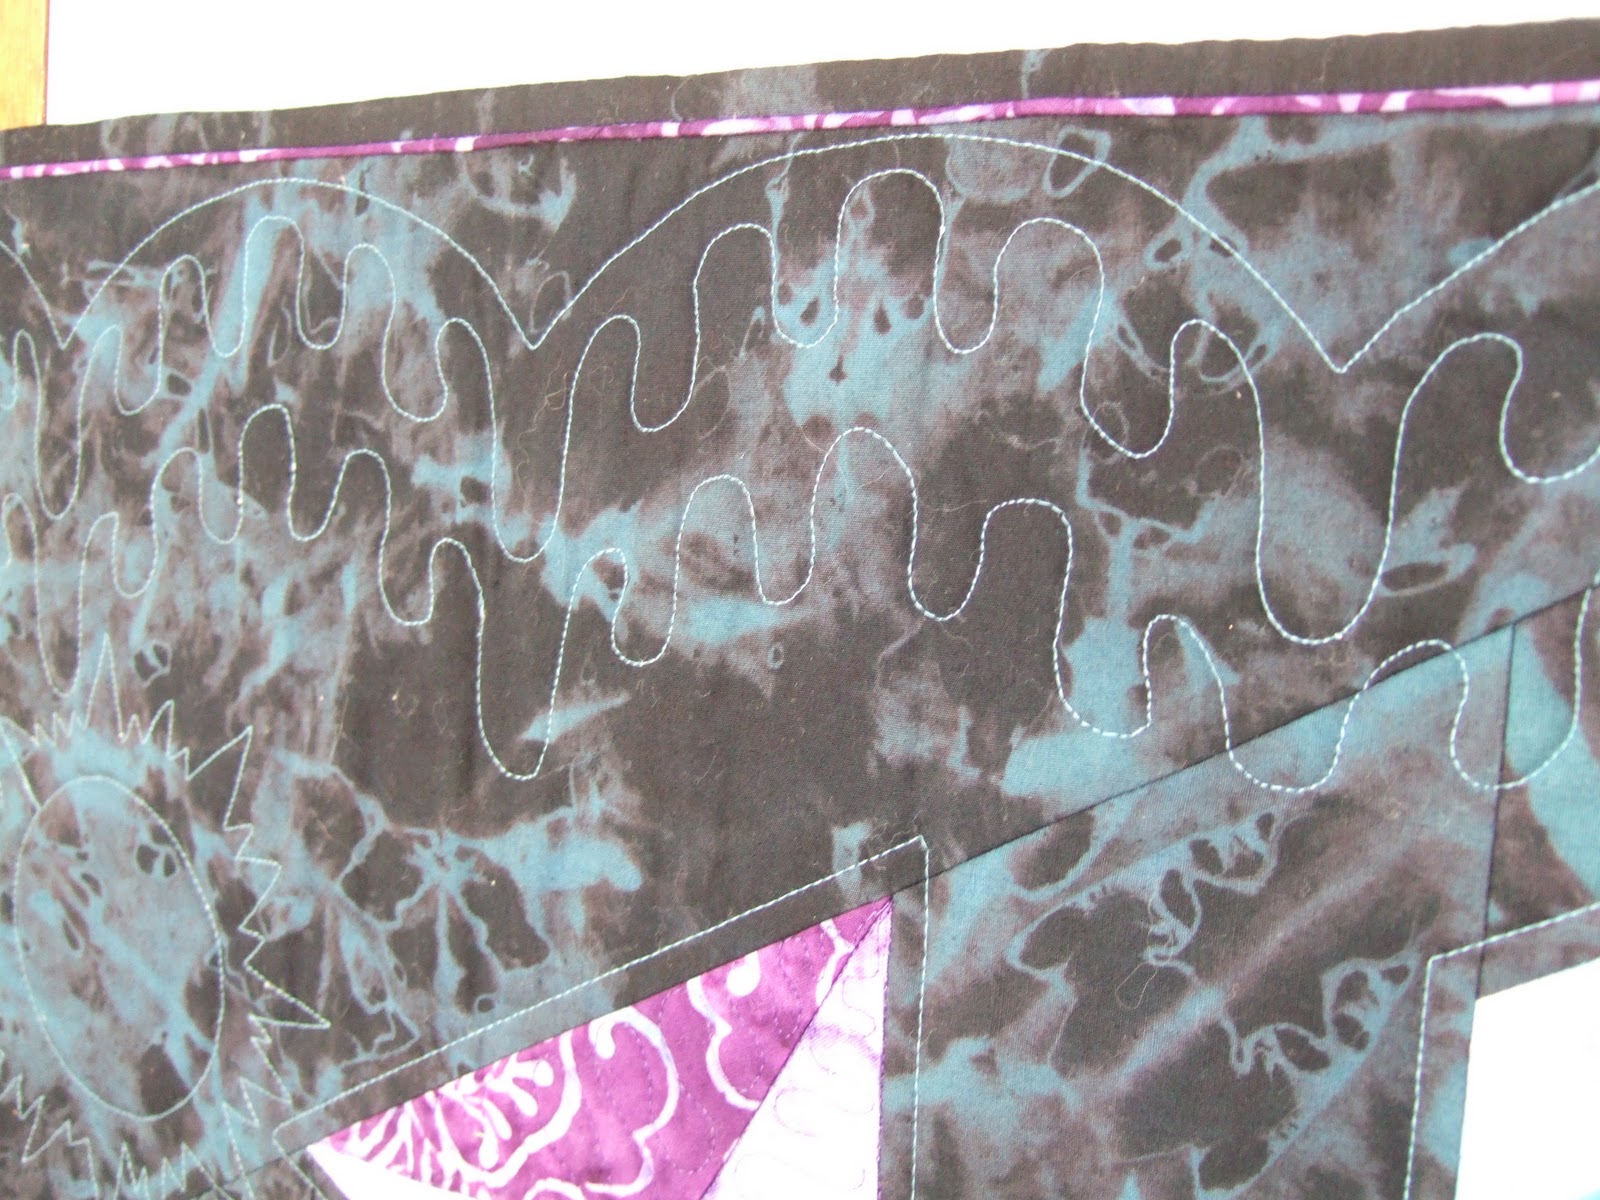
The retreat coordinator was sewing binding on this quilt. It's a solids only quilt made from a Kaufmann Kona charm pack. What an effective, dramatic design. It's quilted with circles within circles.

One of the especially prolific quilters I became acquainted with is Nikki who blogs here. She recently finished this Spider Web quilt top. 

Her Spider Web has some unexpected details.

Nikki's hand embroidered spiders!

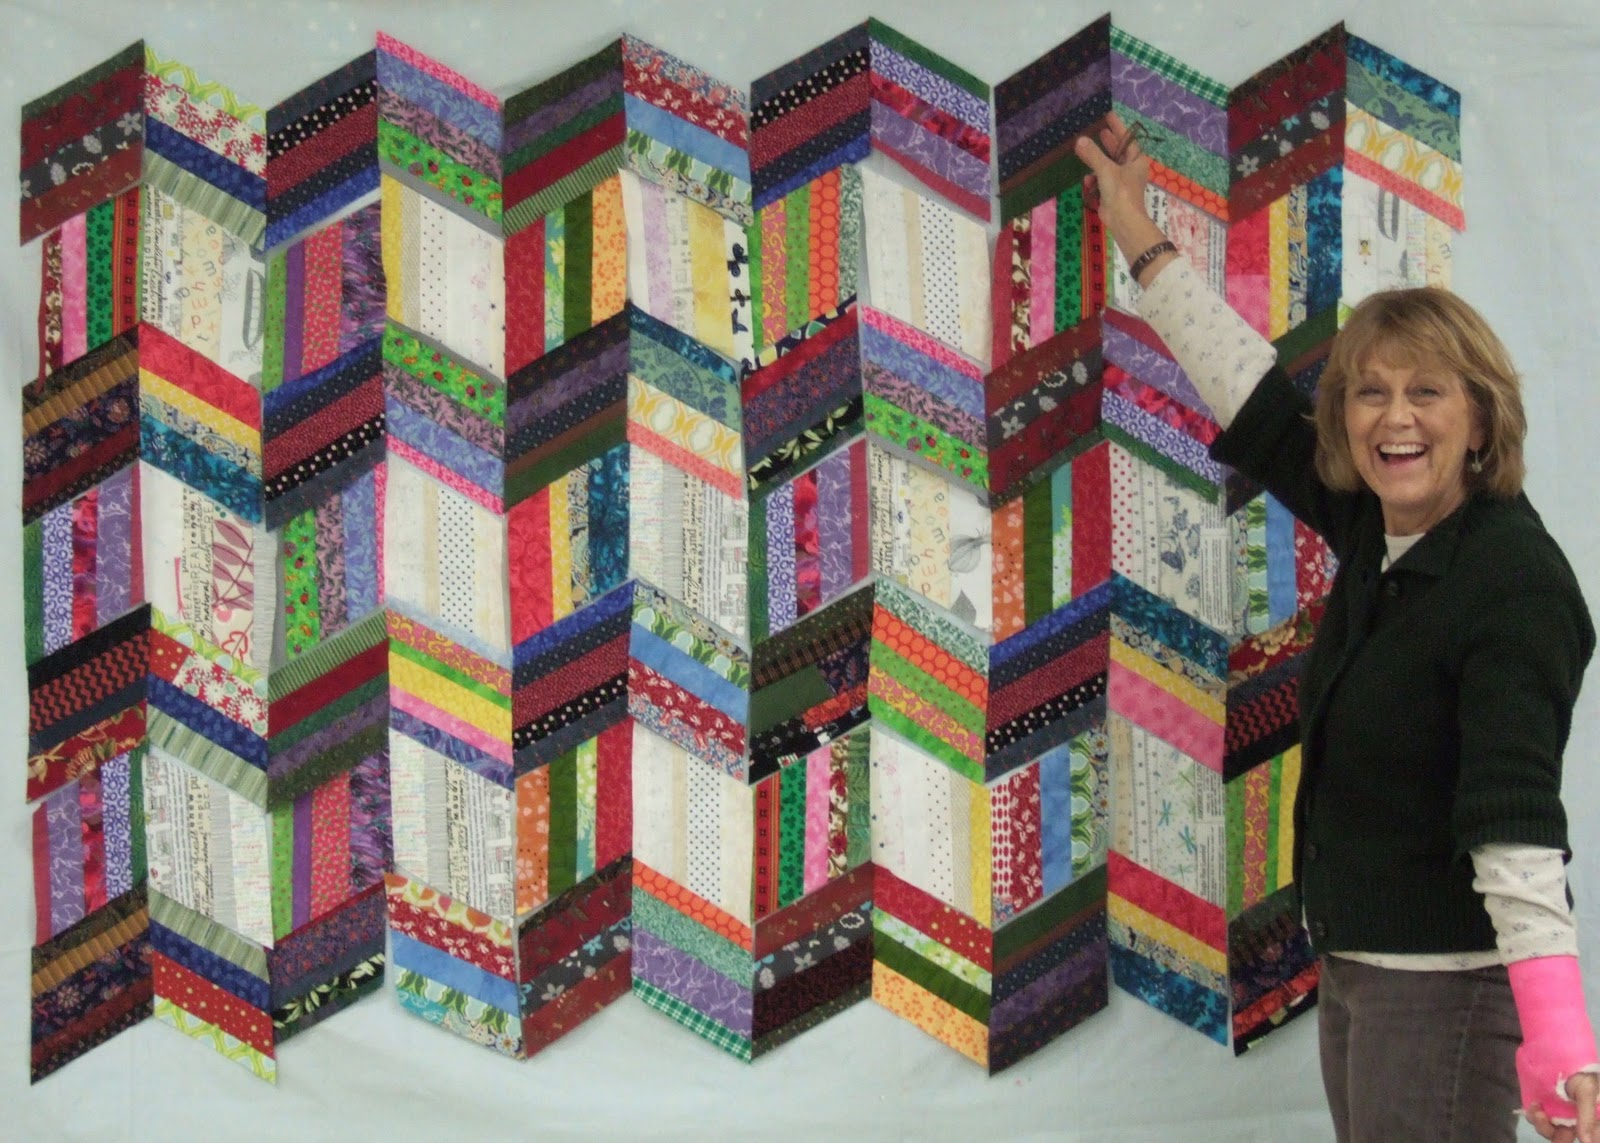
Carla and I both sewed a design called "Picket Fence." It's from an Elsie Campbell book String Quilts. Picket Fence is design in which assorted width strips are sewn together according to lights, mediums and darks, and then cut into 60-degree diamonds.

The diamond blocks Carla is happily "ta-dah-ing" on our design wall are a mix of diamonds each of us cut and sewed from our own strips stash.

Before we parted company, we swapped light, medium and dark-colored diamonds with each other, so each of our two quilts will be even scrappier.
I'm on the left; Carla's on the right
Though, based on just my strips, I don't think I'll have much trouble making my Picket Fence fairly scrappy!

After the quilt retreat, an unexpected activity found us very literally quaking in our boots! Saturday night, while at our daughter's house, were awake at 10:53 p.m. when the 5.6 magnitude earthquake rumbled three miles below ground near Prague, Oklahoma. Even in Kansas City, 300 miles (428 K) away, we felt the bed tremble and listened to the closed bedroom door rattle in its door frame. Though I knew what it was, having felt a similar tremor back in 1965 when living in Ohio, it's still not something you expect here in the Midwest. Tornados? Yes, aplenty. But an earthquake? Certainly not!

Another reason for visiting KC was to celebrate this little guy's first birthday which was Sunday. Would you believe he wouldn't eat birthday cake?! He'd never had cake, and even after a couple attempts were made to put it in his mouth, he refused it.
Aesa and Bapa
Last year I started washing and saving containers from my favorite yogurt: Yoplait. These containers are durable for chewing on, and throwing around without a chance of hurting anyone - great fun with little ones, building towers and making roads. My grandsons know I'll play "stacks" with them anytime. Here's one of their favorite things to do.

Linda

LinkWithin

Related Posts Widget for Blogs by LinkWithin